Girl.
Why have I been breading chicken with four bowls all these years?!
You know how it goes. Milk. Flour. Egg. Breadcrumbs. Half the counter is dirty, and by the time you’re finished your fingers have ten different little crusty breading hats on them.
You KNOW the finger caps I’m talking about. 😂
Then a friend saw me breading chicken the old-fashioned way and basically said, Why aren’t you using baggies?
Excuse me?
Somebody’s Mamaw should’ve told me this YEARS ago.
Toss the Bowls
The basic idea couldn’t be easier:
Milk → Seasoned Flour → Egg → Breadcrumbs
Except instead of bowls, we’re using zip-top bags.
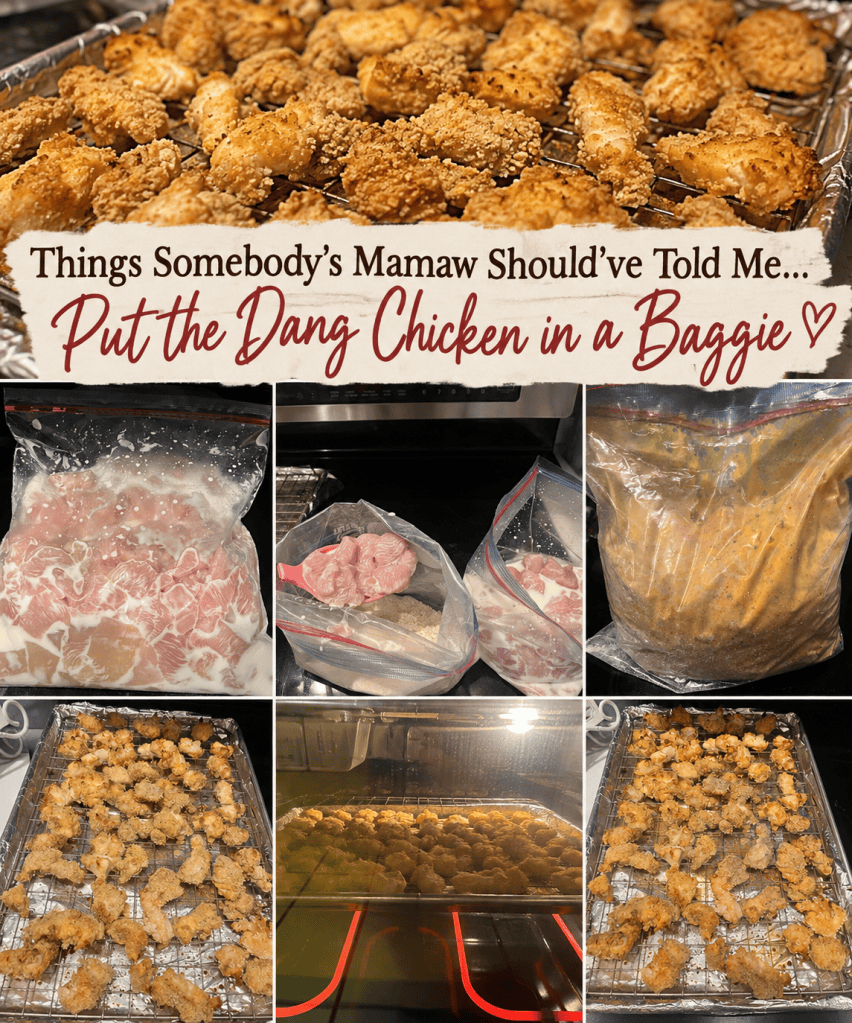
And here’s the part that really saves your hands: use a slotted spoon to move the chicken from bag to bag.
Scoop it out, let the excess drip off, drop it into the next bag, seal her up and SHAKE.
No raw-chicken fingers. No flour paste stuck to your hands. No breading mittens.
It’s basically Shake ‘N Bake’s slightly chaotic cousin. 😂
And You Don’t Actually Need Four Baggies
My first thought was four steps = four bags.
But if you’re trying not to burn through half a box of baggies every time you make dinner, you can do it with two.
Start your chicken in the milk. When it’s time for the egg, remove the chicken, dump the leftover milk, and put your beaten egg mixture right into that same bag.
Same thing with the dry side. Start with your seasoned flour. When you’re finished flouring the chicken, get rid of the excess except for what you want to mix with your breadcrumbs. Add about 1½ cups Italian breadcrumbs right into that bag and you’ve got your final coating.
Two bags. Less cleanup. Less waste.
Now, naturally, I thought:
If two bags work… surely ONE bag is even better.
Hunnies.
No.
I tried it.
It became a matted, gummy mess that looked like chicken and papier-mâché had started a family.
One bag is a no-go, friends. A NO-GO. 😂
Sometimes efficiency has boundaries.
What I Used
For about 2 pounds of chicken, cut into bite-sized pieces:
Wet side
- About 1 cup milk
- Salt
- 8 eggs, beaten
- Salt, pepper and paprika for the eggs
Dry side
- About 2 cups flour
- Garlic salt — and don’t be shy
- Black pepper
- Paprika
- About 1½ cups Italian breadcrumbs
- A little of the seasoned flour reserved to mix with the breadcrumbs
And this is scalable, which might be my favorite part.
Making four chicken tenders? Use quart-size bags and smaller amounts.
Making two pounds of chicken because apparently you’ve decided to cater dinner?
Gallon bags, babycakes. 😂
Shake ‘Em and Let ‘Em Chill
Once the chicken reaches whichever bag it’s in, close it and give it a good shake until everything is coated.
After the final breadcrumb coating, move the pieces onto a wire rack over your baking sheet and let them sit for a few minutes while you get everything ready.
I sprayed my setup, baked mine at 415°F, and checked/moved them around at about the 12-minute mark.
I let mine go for 25 minutes because I wanted them more golden.
When I checked the temperature?
190°F.
Whoops. 😂
Chicken needs to reach 165°F internally, so mine absolutely could’ve come out sooner. Next time I’ll start checking the temperature earlier rather than holding them hostage in the oven because I want them prettier.
That being said, those little suckers were still JUICY and full of flavor.
The breading wasn’t perfectly even and some came off when I moved them, but we didn’t care. We actually prefer lighter breading—we’re the people ordering naked wings anyway. 😂
Most of the time these are getting dipped in sauce or tossed in a glaze. I need tasty chicken, not nuggets ready for a magazine cover.
Make More Than You Need
This might be my biggest takeaway.
If you’re already breading chicken, make extra.
My original plan that night was homemade sweet-and-sour sauce.
Small problem: I didn’t have brown sugar.
Kind of important. 😂
So instead, my husband started making his own dipping sauce, everybody joined in, and suddenly we had a make-your-own-sauce chicken night with mac and cheese casserole.
No vegetables.
I forgot them until everything else was finished.
Would green beans have suddenly made chicken nuggets and mac and cheese a perfectly balanced meal?
No.
Would seeing something green on that plate have made me feel better?
Absolutely. 😂
But the extra chicken REALLY earned its keep the following night.
I got home at 6:35 PM on a busy evening. I pulled out the leftover nuggets and turned them into loaded chicken nugget tater tots.
We were sitting down eating by 7:00 PM.
Was that nutritionally superior to Night One?
Let’s not ask questions we don’t want answers to. 😂
But dinner was on the table in 25 minutes, my family ate, we used what we already had, and I didn’t have to start from scratch.
That’s a win.
You can keep the extras in the fridge for the next night or freeze them for later.
Somebody’s Mamaw Should’ve Told Me
That’s it.
No revolutionary recipe. No fancy kitchen gadget.
Just:
Use the baggies.
Use the slotted spoon.
Don’t try to get cute and use only one bag. 😂
And if you’re already doing the work, make extra.
Because sometimes the best kitchen trick isn’t about making dinner prettier.
It’s about making tonight easier—and maybe making tomorrow night a whole lot easier too.
Grace for the mess. Grit for the rest. 💗


Leave a comment